Fedora Self–Hosted Server
Manage from Mac

Let’s install some useful packages on the Mac from Brew

This post explains how to install packages on Fedora with a script

I am explaining how to setup Lima Virtual Machines

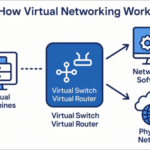
This post explains the different options for networking with Lima on a Mac. The Lima people have provided a Mermaid flowchart network guide to help you choose the best configuration for the Fedora VM.

I introduce Lima Virtual Machines for Mac. Instead I am going to show you how to use Lima and if you had used my Brew package installer script from a previous post, Lima is already installed and ready to go!

I show how to install Fedora on a Mac. Because we are using Lima, the process of installing a Fedora is not exactly the same as on metal or in a VM, although post install configuration shares a lot in common.
| hf:tax:feeds | hf:tax:topic | |
|---|---|---|
Date: 28 February 2025 Topic: Hardware, MiniPC, Self Hosting Source: Reddit | news-hardware news-minipc news-selfhosting | |
Date: 28 February 2025 Link: Cockpit 334 Topic: Fedora, Self Hosting, Systems mgmt, Utilities Source: Cockpit Project | cockpit-project | news-fedora news-selfhosting news-systemsmgmt news-utilities news-linux news-operatingsystems news-applications |
Date: 28 February 2025 Link: Ask an OpenShift Admin| Ep 147 |Backup Like a Pro: Trilio’s OpenShift Virtualization Survival Guide Topic: RHEL, Self Hosting, Virtual Machines, Virtualization Source: YouTube | youtube | news-rhel news-selfhosting news-vm news-virtualization news-linux news-operatingsystems |
Date: 28 February 2025 Topic: Publishing, Web Source: arstechnica | arstechnica | news-publishing news-web |
Date: 28 February 2025 Source: Macworld | macworld | news-mac news-packaging news-hardware news-systemsmgmt |
Date: 28 February 2025 Source: How-To Geek | how-to-geek | news-hardware news-minipc |
Date: 28 February 2025 Topic: Publishing, Web Source: WordPress Developer | wordpress-developer | news-publishing news-web |
Date: 28 February 2025 Source: Tom's Hardware | toms-hardware | news-hardware news-minipc |
Date: 28 February 2025 Link: Mathesar Topic: Self Hosting Source: github | github | news-selfhosting |
Date: 28 February 2025 Topic: Applications, Containers, Virtualization Source: Fossery | fossery | news-applications news-containers news-virtualization |
Date: 28 February 2025 Topic: Hardware, MiniPC, Self Hosting Source: YouTube | youtube | news-hardware news-minipc news-selfhosting |
Date: 27 February 2025 Source: YouTube | youtube | news-hardware news-minipc |
Date: 27 February 2025 Topic: Networking, Security, Self Hosting Source: OSTechNix | ostechnix | news-networking news-security news-selfhosting news-systemsmgmt |
Date: 26 February 2025 Source: YouTube | youtube | news-fedora news-packaging news-linux news-operatingsystems news-systemsmgmt |
Date: 26 February 2025 Topic: Self Hosting Source: It's FOSS News | its-foss-news | news-selfhosting |
Date: 26 February 2025 Source: YouTube | youtube | news-fedora news-hardware news-minipc news-linux news-operatingsystems |
Date: 26 February 2025 Topic: Hardware, Networking, Self Hosting Source: YouTube | youtube | news-hardware news-networking news-selfhosting |
Date: 26 February 2025 Topic: MacOS Source: SetApp | setapp | news-macos news-operatingsystems |
Date: 26 February 2025 Topic: Hardware, Systems mgmt Source: YouTube | youtube | news-hardware news-systemsmgmt |
Date: 26 February 2025 Link: Samsung’s 9100 Pro SSD boasts 14,8 GB/s read speeds, making it the world’s fastest consumer drive Topic: Hardware Source: Tom's Hardware | toms-hardware | news-hardware |
Date: 26 February 2025 Source: Liliputing | liliputing | news-hardware news-minipc |
Date: 26 February 2025 Source: ServeTheHome | servethehome | news-hardware news-minipc |
Date: 26 February 2025 Topic: Self Hosting Source: Linuxiac | linuxiac | news-selfhosting |
Date: 25 February 2025 Source: MakeTechEasier | maketecheasier | news-linux news-utilities news-operatingsystems news-applications |
Date: 25 February 2025 Source: Liliputing | liliputing | news-hardware news-linux news-minipc news-operatingsystems |
Date: 25 February 2025 Topic: Self Hosting Source: OpenProject | openproject | news-selfhosting |
Date: 25 February 2025 Topic: Applications, Self Hosting Source: FOSS Force | foss-force | news-applications news-selfhosting |
Date: 25 February 2025 Topic: Self Hosting, Systems mgmt, Utilities Source: YouTube | youtube | news-selfhosting news-systemsmgmt news-utilities news-applications |
Date: 24 February 2025 Topic: Virtual Machines, Virtualization Source: How-To Geek | how-to-geek | news-vm news-virtualization |
Date: 23 February 2025 Source: How-To Geek | how-to-geek | news-storage news-utilities news-hardware news-applications |
Date: 23 February 2025 Topic: Linux Source: Linux Journal | linux-journal | news-linux news-operatingsystems |
Date: 23 February 2025 Source: How-To Geek | how-to-geek | news-shells news-utilities news-systemsmgmt news-applications |
Date: 23 February 2025 Source: How-To Geek | how-to-geek | news-clitui news-shells news-utilities news-applications news-systemsmgmt |
Date: 22 February 2025 Topic: Regulations, Security Source: Verge | verge | news-regulations news-security news-selfhosting news-systemsmgmt |
Date: 22 February 2025 Topic: Self Hosting Source: LinuxLinks | linuxlinks | news-selfhosting |
Date: 21 February 2025 Link: FLOSS 821: Rocky Linux Topic: RHEL Source: YouTube | youtube | news-rhel news-linux news-operatingsystems |
Date: 21 February 2025 Topic: Networking, Security, Self Hosting Source: Noted | noted | news-networking news-security news-selfhosting news-systemsmgmt |
Date: 20 February 2025 Source: LinuxLinks | linuxlinks | news-linux news-utilities news-operatingsystems news-applications |
Date: 20 February 2025 Topic: Self Hosting, Systems mgmt, Utilities Source: github | github | news-selfhosting news-systemsmgmt news-utilities news-applications |
Date: 19 February 2025 Source: YouTube | youtube | news-linux news-storage news-utilities news-operatingsystems news-hardware news-applications |