Fedora Self–Hosted Server
Manage from Mac
$ limactl create
The shell will return a small TUI to help you create your first virtual machine
? Creating an instance "default"  [Use arrows to move, type to filter]
> Proceed with the current configuration
  Open an editor to review or modify the current configuration
  Choose another template (docker, podman, archlinux, fedora, ...)
  Exit
Navigate the > to Choose another template… and press Return. A list will appear. Using the Down-Arrow key navigate to fedora and press **Return ** again
? Choose a template f  [Use arrows to move, type to filter]
  apptainer-rootful
  default
  docker-rootful
  experimental/virtiofs-linux
  faasd
> fedora

# After selecting "fedora", press reurn again to proceed with the install
> Proceed with the current configuration
  Open an editor to review or modify the current configuration
  Choose another template (docker, podman, archlinux, fedora, ...)
  Exit
When the installation process is finished Lima will print the command to get into the VM’s shell: As the install is from a frozen cloud image the first thing I do in the shell is run an update.
Note: if this is the only Lima instance, just entering Lima will put the terminal in the shell otherwise the command limactl shell [vm-instance-name]. If you forget the name of the instance just enter limactl list
INFO[0066] Run `limactl start default` to start the instance.
INFO[0076] READY. Run `lima` to open the shell.
$  lima
[user@computera-vm-instance]:[~/]$pwd
$ ~/
$ sudo dnf update --refresh
Fedora 39 - aarch64                                                                                                          6.0 kB/s |  16 kB     00:02
Fedora 39 openh264 (From Cisco) - aarch64                                                                                    829  B/s | 990  B     00:01
Fedora 39 - aarch64 - Updates                                                                                                 11 kB/s |  14 kB     00:01
Dependencies resolved.
======================================================================================
 Package                  Architecture              Version                    Repository                 Size
======================================================================================
Installing:
 kernel-core              aarch64                   6.6.7-200.fc39  updates      19 M
Upgrading:
 NetworkManager           aarch64                   1:1.44.2-1.fc39 updates      2.0 M
 NetworkManager-libnm     aarch64                   1:1.44.2-1.fc39 updates      1.8 M
… [skipping till the end]

Transaction Summary
======================================================================================
Install    6 Packages
Upgrade  149 Packages

Total download size: 240 M
Is this ok [y/N]: y
This upgraded 155 packages including the kernel, so at the end I restart the VM. I have learned through experimentation that a reboot command will not update the active kernal to the new one. Instead just exit the shell and shut down/restart the VM.
$ [user@computera-vm-instance]:[~/]$exit
$ limactl stop fedora-39-de
$ limactl list

NAME     	  STATUS   SSH             VMTYPE ARCH     CPUS MEMORY DISK   DIR
fedora-39-de. Stopped  127.0.0.1:60022 qemu   aarch64  4    4GiB   100GiB /Path/to/VM
$ limactl start fedora-39-de
Neofetch is a command-line system information tool written in bash 3.2+. Neofetch displays information about your operating system, software and hardware in an aesthetic and visually pleasing way.
$ sudo dnf install neofetch
$ neofetch

$ neofetch
             .',;::::;,'.                mac2net@lima-default
         .';:cccccccccccc:;,.            --------------------
      .;cccccccccccccccccccccc;.         OS: Fedora Linux 39 (Cloud Edition) aarch64
    .:cccccccccccccccccccccccccc:.       Host: QEMU Virtual Machine virt-8.2
  .;ccccccccccccc;.:dddl:.;ccccccc;.     Kernel: 6.6.7-200.fc39.aarch64
 .:ccccccccccccc;OWMKOOXMWd;ccccccc:.    Uptime: 44 mins
.:ccccccccccccc;KMMc;cc;xMMc:ccccccc:.   Packages: 660 (rpm)
,cccccccccccccc;MMM.;cc;;WW::cccccccc,   Shell: bash 5.2.21
:cccccccccccccc;MMM.;cccccccccccccccc:   Resolution: 1280x800
:ccccccc;oxOOOo;MMM0OOk.;cccccccccccc:   Terminal: /dev/pts/0
cccccc:0MMKxdd:;MMMkddc.;cccccccccccc;   CPU: (4)
ccccc:XM0';cccc;MMM.;cccccccccccccccc'   GPU: 00:04.0 Red Hat, Inc. Virtio 1.0 GPU
ccccc;MMo;ccccc;MMW.;ccccccccccccccc;    Memory: 239MiB / 3896MiB
ccccc;0MNc.ccc.xMMd:ccccccccccccccc;
cccccc;dNMWXXXWM0::cccccccccccccc:,
cccccccc;.:odl:.;cccccccccccccc:,.
:cccccccccccccccccccccccccccc:'.
.:cccccccccccccccccccccc:;,..
  '::cccccccccccccc::;,.
Here’s the colour image…

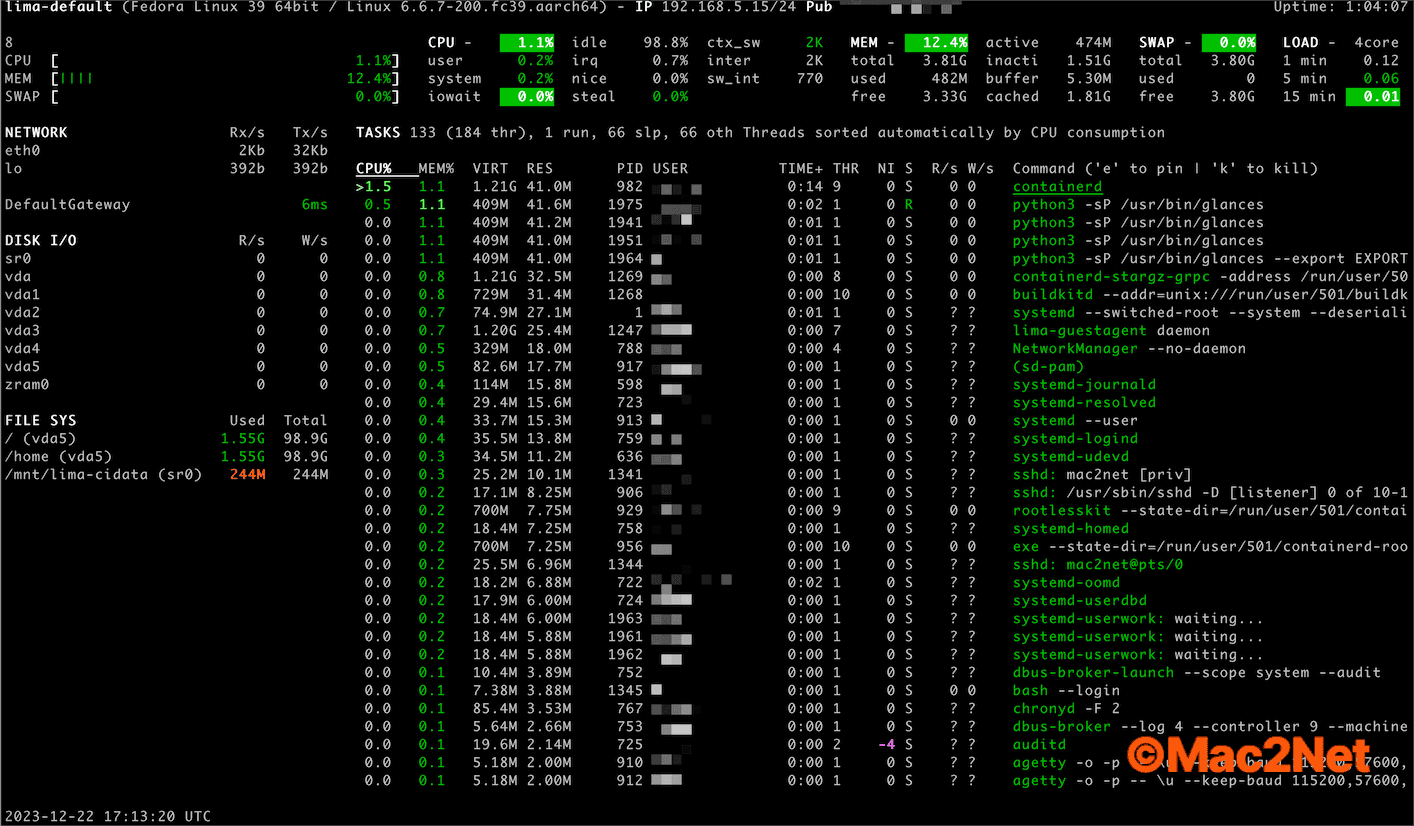
Glances is a cross-platform system monitoring tool written in Python.
$ sudo dnf install glances
$ glances
From this point I can install any package in the standard Fedora release repositories as well as all the available Fedora group packages. Entering dnf grouplist --hidden will tell the VM to query the Fedora repositories and list all the current packages available.
You wouldn’t have it any other way! In a contradictory fashion, the developers have produced an install of Lima that requires a bit of fiddling to customise. Linux comes with over 40 templates in YAML format which are easy to read and modify. But they are stored in a hidden folder. In addition, the virtual machines themselves, which can easily become bigger than 2 gigabytes, while stored in a different location than the templates, are also in a hidden folder. Any modifications to templates or additions made to the templates folder will be wiped out every time Lima is updated through Brew.
On an ARM64 Mac, Lima templates are stores at:
/opt/homebrew/Cellar/lima/0.19.0/share/lima/templates
But I just ran a Brew upgrade and when it finishes Lima will be at a new location:
/opt/homebrew/Cellar/lima/0.19.1/share/lima/templates
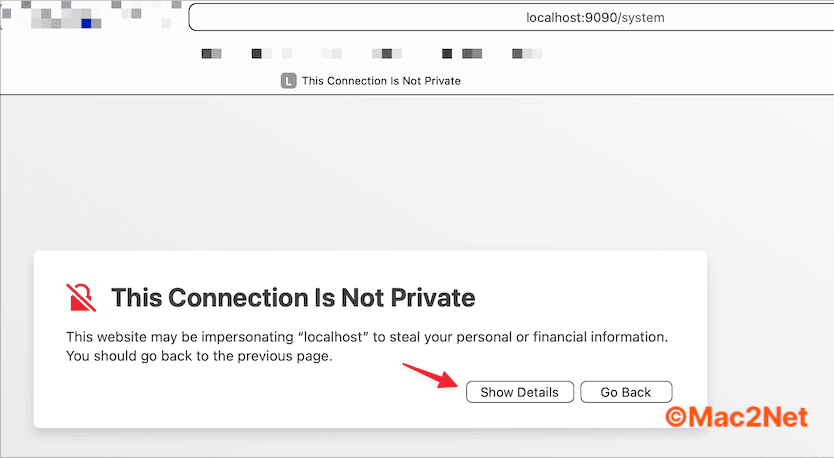
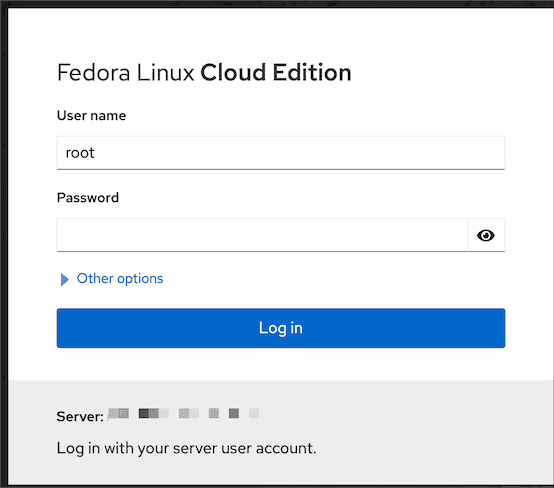
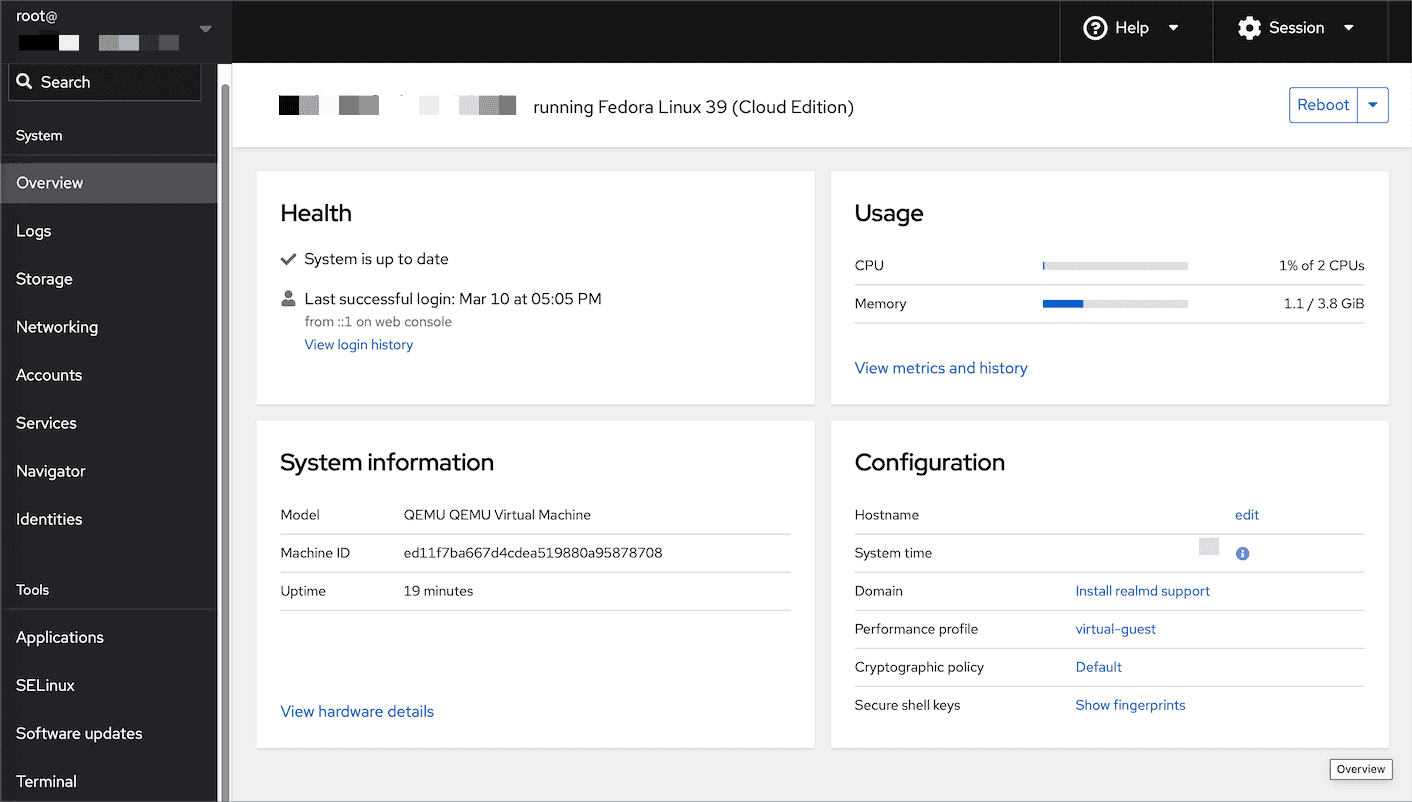
Once the VM has been installed and executed the bash scripts, it is time to fire up Cockpit.
Note While a Lima-based Cockpit is accessed via port 9090, in an ideal world any and all Cockpits configured on your server whether they be on the metal or in a VM should be accessed via SSH – usually on port 22.
In addition Lima does not allow a public accessible IPv6 address. If you are trying to reach your IPv6 SHES server from a remote location, you will either need to have a computer running Linux with Cockpit on the metal or in a VM (like a MBA) OR use a VNC client app that allows you to connect to a remote VNC server via SSH assuming the server has an open port 22 and an accessible IPv6 address.
In addition Lima does not allow a public accessible IPv6 address. If you are trying to reach your IPv6 SHES server from a remote location, you will either need to have a computer running Linux with Cockpit on the metal or in a VM (like a MBA) OR use a VNC client app that allows you to connect to a remote VNC server via SSH assuming the server has an open port 22 and an accessible IPv6 address.
In addition Lima does not allow a public accessible IPv6 address. If you are trying to reach your IPv6 SHES server from a remote location, you will either need to have a computer running Linux with Cockpit on the metal or in a VM (like a MBA) OR use a VNC client app that allows you to connect to a remote VNC server via SSH assuming the server has an open port 22 and an accessible IPv6 address.
To access Cockpit running on the Mac you are using without bridge mode point your browser to https://locahost. Or – in bridge mode – https://local-ip-address. If you are intending to access Cockpit on another local Mac which is in bridged mode that you presumably are connected to via SSH, enter the VM’s shell and enter the ip address command to retrieve the IP address as follows:
$ ssh user@vm-host
vm-host $limactl shell vm-name
vm-host vm-name $ ip address show lima0
Because

Upload another bash script to install more utilities.
#!/bin/bash
dnf -y install bpytop
dnf -y install bandwhich
dnf -y install ranger
dnf -y install hdparm
dnf -y install mc
dnf -y install ncdu
dnf -y install grsync
dnf -y install blivet-gui
dnf -y install btop
dnf -y install nmap
dnf -y install wget
dnf -y install lshw
dnf -y install borgmatic
Download the session
Full text
#!/bin/bash
dnf -y install bpytop
dnf -y install bandwhich
dnf -y install ranger
dnf -y install hdparm
Here
dnf -y install bpytop dnf -y install bandwhich dnf -y install ranger dnf -y install hdparm dnf -y install mc dnf -y install ncdu dnf -y install grsync dnf -y install blivet-gui dnf -y install btop dnf -y install nmap dnf -y install wget dnf -y install lshw dnf -y install borgmatic dnf -y groupinstall Editors dnf -y install switchdesk switchdesk-gui dnf -y install duf dnf -y install btrfs-assistant dnf -y install vorta dnf -y install NetworkManager-tui dnf -y install gnome-system-monitor dnf -y install gnome-disk-utility dnf -y install tuned systemctl start tuned systemctl enable tuned dnf -y install deja-dup dnf -y install bash-color-prompt dnf -y groupinstall "LXQt" dnf -y groupinstall "Applications for the LXQt Desktop" More examples
Uploading is simple with Cockpit.
BTW many (but not all) of these utilities can also be installed directly in MacOS with are old friend Brew. Let’s look up ncdu on Brew. First of all what is ncdu? Just ask The Fedora…
$ dnf info ncdu
Last metadata expiration check: 1:04:30 ago on Mon 11 Mar 2024 06:04:02 AM CET.
Installed Packages
Name         : ncdu
Version      : 1.19
Release      : 1.fc39
Architecture : x86_64
Size         : 111 k
Source       : ncdu-1.19-1.fc39.src.rpm
Repository   : @System
From repo    : fedora
Summary      : Text-based disk usage viewer
URL          : https://dev.yorhel.nl/ncdu/
License      : MIT
Description  : ncdu (NCurses Disk Usage) is a curses-based version of the well-known 'du',
             : and provides a fast way to see what directories are using your disk space.
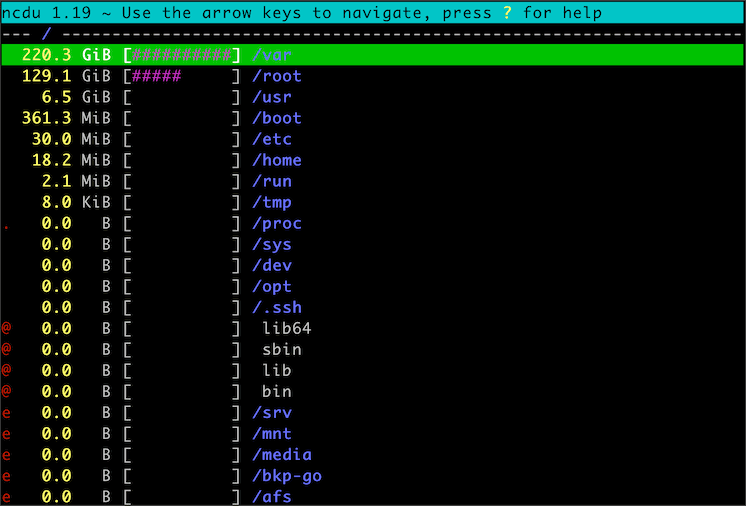
Here it is at work…
ncdu 1.19 ~ Use the arrow keys to navigate, press ? for help
--- / --------------------------------------------------------------------
  220.3 GiB [##########] /var
  129.1 GiB [#####     ] /root
    6.5 GiB [          ] /usr
  361.3 MiB [          ] /boot
   30.0 MiB [          ] /etc
   18.2 MiB [          ] /home
    2.1 MiB [          ] /run
    8.0 KiB [          ] /tmp
.   0.0   B [          ] /proc
    0.0   B [          ] /sys
    0.0   B [          ] /dev
    0.0   B [          ] /opt
    0.0   B [          ] /.ssh
@   0.0   B [          ]  lib64
@   0.0   B [          ]  sbin
@   0.0   B [          ]  lib
@   0.0   B [          ]  bin
e   0.0   B [          ] /srv
e   0.0   B [          ] /mnt
e   0.0   B [          ] /media
e   0.0   B [          ] /bkp-go
e   0.0   B [          ] /afs
*Total disk usage: 356.3 GiB   Apparent size: 128.4 TiB   Items: 809668
This is an image of the screen
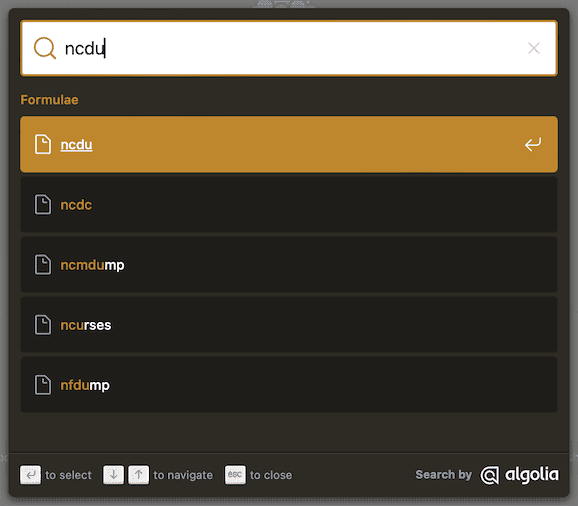
As a result of the apex powers at Apple, ncduwould actually be a useful utility for the Mac. Let’s go to https://brew.io and see if it is available and how to install it. Enter ncdu in Brew’s Search box.
Brew will respond with a list of packages that match the search criteria. Click on it ncdu
Brew will provide all the information required to get started with installing and using ncdu.
Let’s go ahead and install it on the Mac and give it a try…
$ brew install ncdu
==> Downloading https://ghcr.io/v2/homebrew/core/ncdu/manifests/2.3
==> Fetching ncdu
==> Downloading https://ghcr.io/v2/homebrew/core/ncdu/blobs/sha256:7c17a54a1c133f106b8ccc577241b977d76de394568b838107c5c397291b6759
###################################################################################################################################### 100.0%
==> Installing ncdu
==> Pouring ncdu--2.3.arm64_sonoma.bottle.tar.gz
🍺  /opt/homebrew/Cellar/ncdu/2.3: 6 files, 574.0KB
==> Running `brew cleanup ncdu`...
Disable this behaviour by setting HOMEBREW_NO_INSTALL_CLEANUP.
Hide these hints with HOMEBREW_NO_ENV_HINTS (see `man brew`).

# Get the sizes of the contents of the Documnts Folder:
$ ncdu ~/Documents
rpm --import -vv /etc/pki/rpm-gpg/RPM-GPG-KEY-redhat-*
How to convert PostScript and EPS files in Sonoma in a VM (Apple silicon)
I obviously have Brew already installed on all my Macs so in order to demonstrate installing Brew I will temporarily setup a MacOS virtual machine on my MacBook Air. Afterwards I will archive it to a USB 3.2.1 drive because unlike Linux virtual machines, MacOS VMs take up a lot space.
Now that Brew is installed on either your personal Mac or another Mac in the same network, let’s install Lima (Linux Machines) with the goal of firing up a Fedora Cloud instance and further learn more about what Fedora has to offer as a self hosted edge services platform.
Lima is sponsored by Cloud Native Computing Foundation (CNCF). This means Lima is seen as a useful tool for cloud computing even though it is basically designed to run locally on MacOS.
Continue reading “Getting started with Lima (Linux Machines)”
Most but not all of the Brew packages I will demonstrate have been forked from Linux. The biggest exceptions are Lima, a package that “launches virtual machines” for “Mac users” and GUI packages that actually get installed in MacOS’ Applications folder and may or may not be available cross-platform.
## Part 1 of Basic Tools series
See Introduction to Mac2Net.com
In [[Posted 1.0 What is Mac2Net?]] , I introduced the software components for operating SHES. In **Part 1, – Getting Started** I am going to introduce how to quickly get started with building Linux virtual machines just with a Mac. In this post, I will introduce the basic tools for running a similar system on MacOS (Intel or ARM – Apple Silicon).
### Brew.sh
Before running out and purchasing a new Mini PC, and these days there are powerful and affordable ones the market, let’s get started installing the Fedora, etc on the Mac. My suggestion is to first install [Brew.sh](https://brew.sh) , “**The Missing Package Manager for macOS (or Linux)**” .

With Brew, almost all the packages required to manage Self-Hosting services are available for MacOS with minimal to no impact on the Mac’s performance or disruption of one’s day to day use of Mac hardware. Brew can also install a few relevant GUI apps directly into the `/Applications` folder and by running `brew update` insure the machine has the latest versions.
### Lima
[LIma](https://lima-vm.io) is an open source software package developed primarily for MacOS to run lightweight Linux **virtual machines**. Lima is not opinionated – it offers templates for, as of this moment, 33 varieties of Linux and containers (more on containers later) as well as 12 experimental options and the ability for these templates to be modified according to one’s needs.

### Why run Lima on the Mac?
With Lima it is easy to install Fedora 39 Cloud Edition along with Cockpit in order to remotely manage Self-hosted edge services from a Mac using a web browser. Cockpit supports Cockpit-to-Cockpit connections over SSH (port 22) which basically means it is not necessary to open the Cockpit port (9090) on the bare metal server or any of the virtual machines in order to access it. This means it is easier to secure access to Cockpit from undesirables.

I usually run Lima on an Intel Mac Mini rather than my personal MacBook Air, although it is installed on this machine as well, in order to avoid it swallowing up precious heavily Apple-taxed Apple Silicon RAM – although through testing I learned that the actual RAM used when running in the background is relatively small. My Mac Mini has a bare minimum 128GB SSD and 64GB RAM, so there are a few more steps required in order to prevent Lima from clogging up my internal SSD which I will explain.
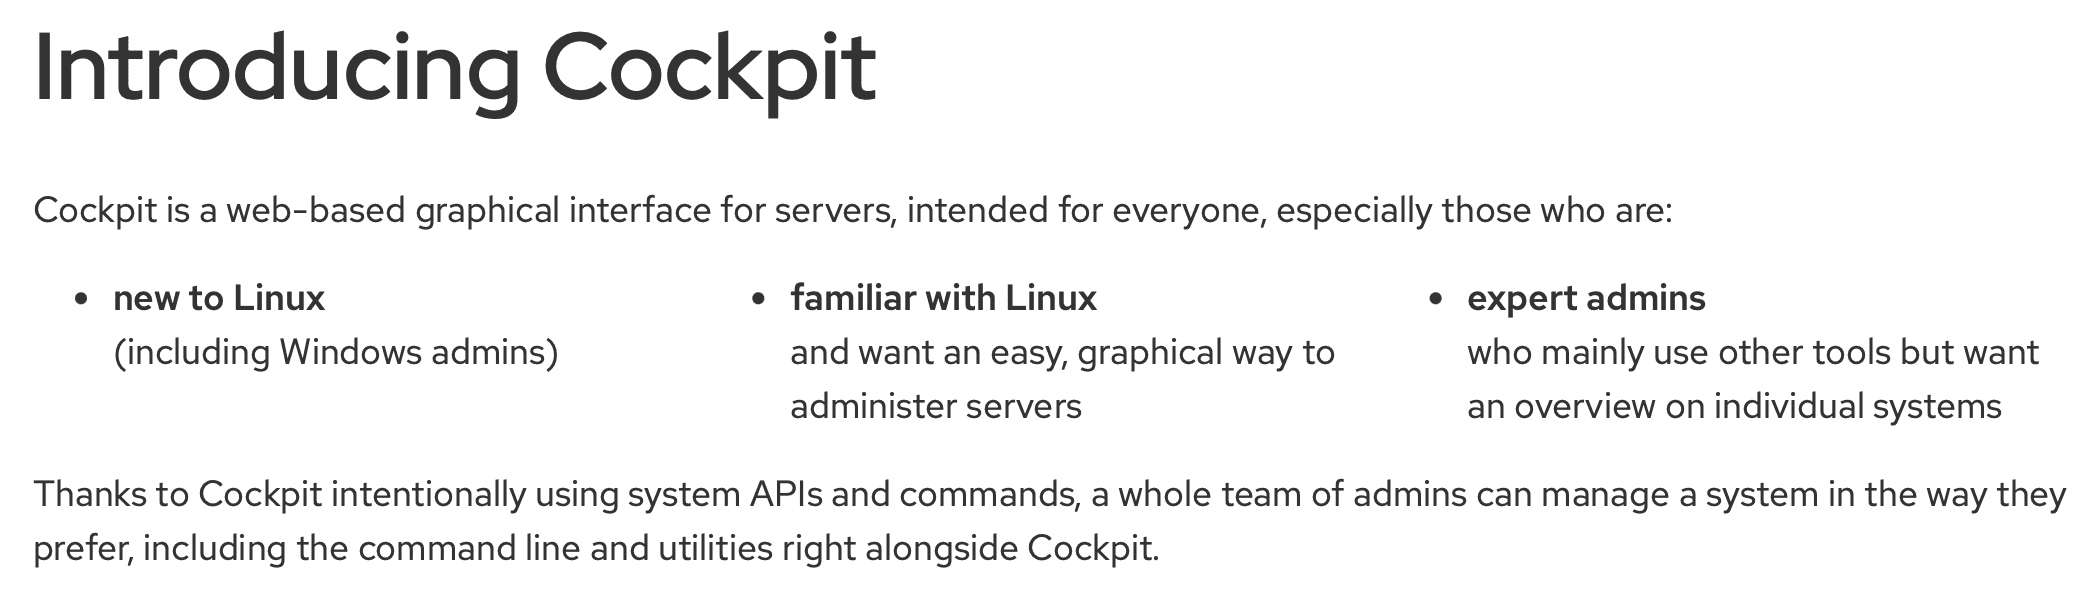
### What exactly is this ‘Cockpit’?
[Cockpit](https://cockpit-project.org) is the ultimate “it slices, it dices” tool to help you run your SHES. While other tools are still required, Cockpit is the fastest and most efficient way to manage a network and quickly investigate when unexpected situations occur, “what the hell is going on?”

### What’s the bottom line here?
Considering how one would manage hosted or cloud services, a Self-Hosted enthusiast is trading access to canned services for
graph LR
 A[Square Rect] -- Link text --> B((Circle))
 A --> C(Round Rect)
 B --> D{Rhombus}
C --> DThe goal of mac2net.com is to provide information, guidance and technical resources to enable an individual or small company to Self-Host edge services.
This basically means buying an affordable yet powerful Mini PC(s) and using it to provide services from your home or premises using Fedora Server installed on bare metal hardware to run virtual machines through Cockpit and other utilities.


Fedora and Cockpit are both sponsored by Red Hat, which is owned by IBM and aggressively enhanced. A new version of Fedora is released every six months or so and a new version of Cockpit is released every two weeks.

The bare metal machine will not run a GUI interface, know in Linux as a desktop environment. Instead if/when a monitor is attached to the machine, it will only display a command line interface. This keeps the hardware lean and mean. Instead, there will be a choice of desktop environments to use when logging in via VNC.

The Mini PC and services running on it will be mostly managed through the aforementioned Cockpit from a Mac – Intel or ARM, it simply doesn’t matter.
As previously mentioned, Fedora is sponsored by Red Hat, which is owned by IBM. IMO, Fedora Linux is the most advanced Linux distribution available. As the saying goes…


It’s complicated. To keep it simple, Fedora sits at the top of a big commercial Linux food chain that includes it’s own Red Hat, Oracle, Centos, and RHEL compatible Suse, Rocky and Alma Linux. RHEL stands for Red Hat Enterprise Linux.
By focusing on using Fedora and its RHEL descendants for Self-Hosted edge services, one can efficiently leverage knowledge across many use cases and software platforms. While I suggest using Fedora on the metal and wherever possible for virtual machine, it is simply not possible to avoid using other RHEL compatible distros as many developers prefer to release packages on the slower moving RHEL rather than Fedora.
#m2n/2 Install-OLS/_text#
[* also iPad›_ $Fedora]
Learn on a local machine and deploy on the local network


or go directly to the Fedora repositoryIndex of /pub/fedora/linux


